Hi
everyone! Today I'm sharing my inspiration project as part of the Random Arts Challenge. Every month there will be a mood board to follow for
inspiration.
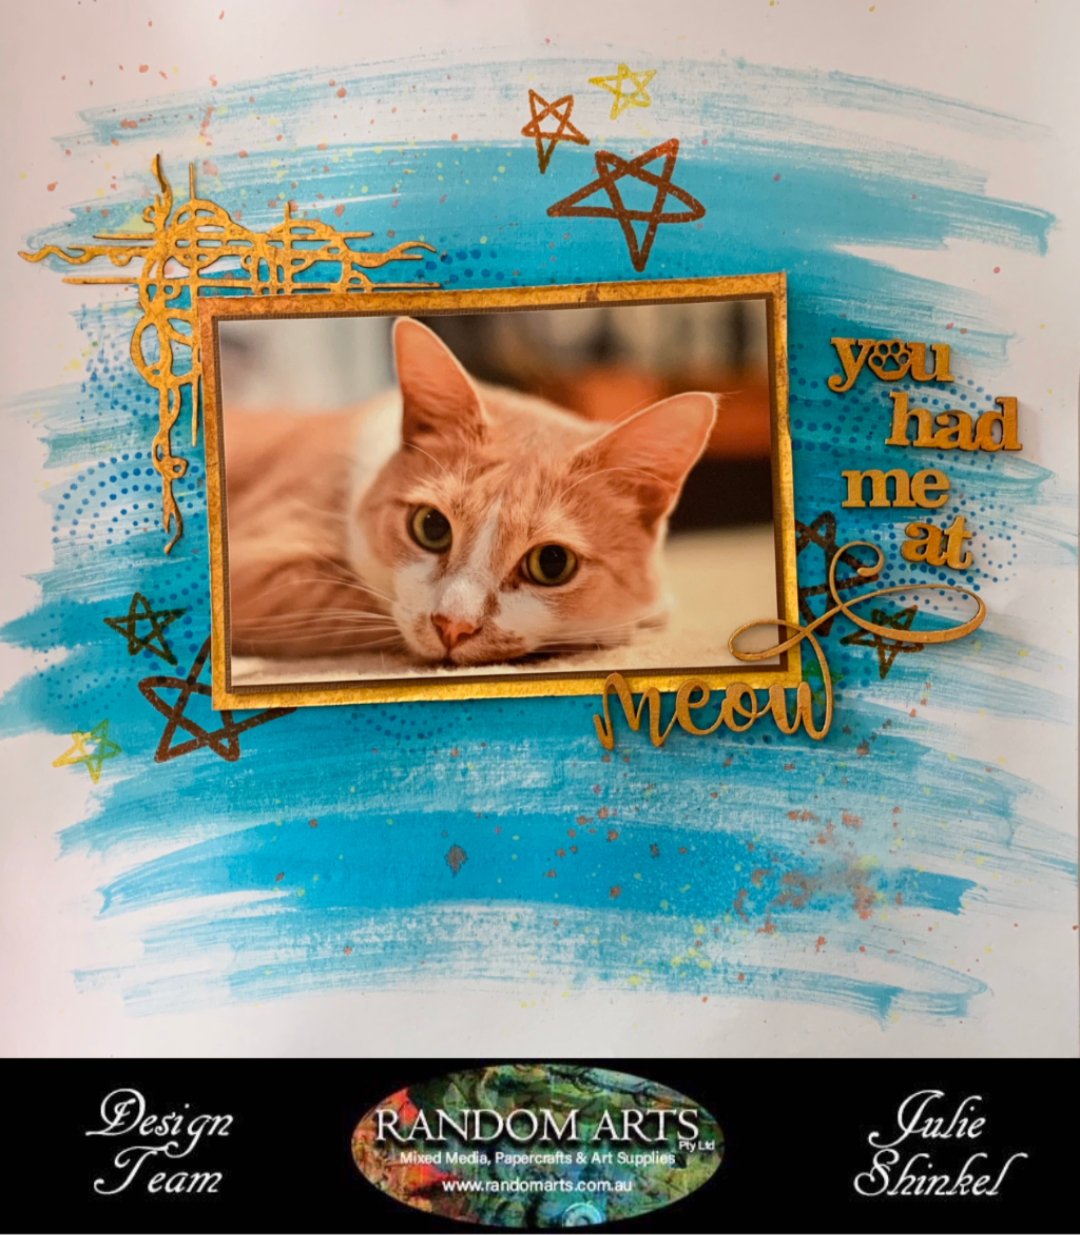
Here is my take on January's mood board plus close ups so you can see how I've created and embellished the page. I've used the ginger cat from the mood board which was perfect because I have a ginger cat. Instead of starfish, I've used stars which have been randomly stamped at three points. For the background I just swiped some Bee Arty (Colour Blast) spray with a paintbrush, a bit of stenciling and added some splutters as contrast. The colours used were also based on the mood board. I then added a die cut, some chipboard and photo mat to finish the layout.
All items used are available from Random Arts Pty Ltd unless otherwise specified e.g. personal stash.


Please use our mood board as inspiration to create anything in any style.
All items used are available from Random Arts Pty Ltd unless otherwise specified e.g. personal stash.


Mood Board Challenge Rules
As these challenges are sponsored by Random Arts Pty Ltd please make sure that you use at least 3 products that are available instore. https://www.randomarts.com.au
There is a $25 voucher up for grabs every month!!
You have until the 11:59pm on the 31st January to enter and then
the entries with the most votes from the group win.
Please note that the vouchers can only be won by residents of Australia,
but if you are from overseas and win the challenge you will be offered a Guest Designer spot.
Make sure you put your entry in the challenge album in our
Random Arts Creative Group to win.
https://www.facebook.com/groups/111931106102590/
Products Used:
White Carstock - Base
Colour Blast by Bee Arty Colour Spray - Saffron
Colour Blast by Bee Arty Colour Spray - Sunset
Colour Blast by Bee Arty Colour Spray - Love
Colour Blast by Bee Arty Colour Spray - Carribean
Colour Blast by Bee Arty Colour Spray - Lagoon
Colour Blast by Bee Arty Simmer Dust - Sunflower
Colour Blast by Bee Arty Clear Stamp Set - Going My Way
Colour Blast by Bee Arty Stencil - Encircled
Colour Blast by Bee Arty Metal Die - Imagine
Dusty Attic Chipboard Title - You Had Me at Meow
Tim Holtz Distress Ink - Ripe Persimmon
Tim Holtz Distress Ink - Rusty Hinge
Tim Holtz Distress Ink - Mustard Seed
Tim Holtz Distress Ink - Salty Ocean
White Gesso

Thanks for stopping by, happy crafting.


