Wednesday 19 February 2020

Love Exists in Our Hearts & Souls Layout for Bee Arty

Wednesday, February 19, 2020 0 Comments
Hi Crafty Bees! Today I'm sharing a layout that I created using the stunning collection designed by Sue Smyth called "Vampyre Rose". This collection captures both "dark and light" and can be used for wedding/formal projects, masculine projects or even what I have done here.. gone to the dark side!

Here is my finished layout with a brief tutorial so you can see how I created it.


Since I have used a lot of different elements from different papers, I've circled each one so you will know exactly which pieces to use.

Take the "Smitten" 12x12 paper to use as the base (reverse side). Cut out the "Love Exists in Our Hearts and Souls" quote from the "Smitten" 12x12 paper. If you don't have a spare sheet of the "Smitten" paper, you can carefully cut it out from your base, cover with scrap paper at the back and then place your embellishments over the area so you won't see it. Ink around the edge with Cranberry Artist Ink and a clean paint brush.


Lightly stencil around the centre photo area and random areas on each side using the "Devotion" stencil and Steel Colour Paste. It plays off the print in the paper perfectly.


Fussy cut the flower clusters from the "Immortal" 12x12 paper - front and back.


Cut out elements from the "Poison" 12x12 paper. You'll need the floral tag in tact. I've fussy cut the crow from the tag and kept the top and bottom to use as embellishments. The "Together Forever" was cut in half and used as part of the photo mat.


Cut the elements from the "Gargoyle" 12x12 paper. You'll need the medium wings, two black and white roses and the arch window which has been cut in half.


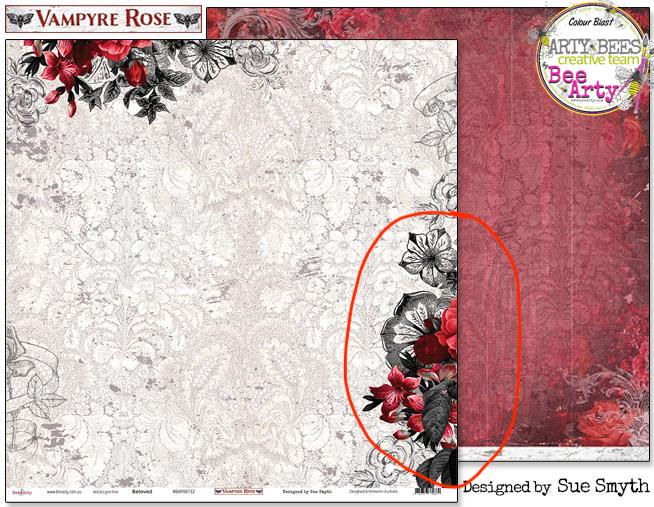
Cut floral elements from the "Beloved" 12x12 paper. I've used the reverse side for photo mat.


Using the dropper, take the Cranberry Artist Ink and dribble ink in five random places as shown. One from each side where you've stenciled coming in from the edge and three coming down from your photo area. It's meant to be blood but you can skip this part if you're not comfortable with it.

Use Cranberry Artist Ink and paint brush to edge the layout base. It doesn't have to be perfect, in fact, the messier the better. Splatter Cranberry Artist Ink with a clean paint brush randomly around the layout (make sure you cover your photo first).

Accent with red heart gems including the Crow's eye and red web trim.

Add some red ribbon to tags.

Here are some close up photos so you can see how I've created and embellished the page.


Wednesday 5 February 2020

In a World Full of Roses be a Sunflower Layout for Bee Arty

Wednesday, February 05, 2020 0 Comments
 Hi Crafty Bees! Today I'm sharing a layout that I created using the Love & Grace Collection designed by Michelle Grant. This is also my first official blog post as part of the Bee Arty Design Team for 2020. I'm super excited to be here creating with this awesome team!


To start, take a 12x12 piece of black cardstock and cut out a one inch frame. Set aside the middle piece for later.

Take the "Portia" 12x12 paper and cut a quarter inch off each side. Adhere to the black cardstock frame. With your fingers curl up the edges of the paper to give a distressed look.

Take the "Vonni" 12x12 paper and cut out the two sunflower panels. Cut out the "Sunflower" sentiment as shown. Keep the scraps, these will be used as part of the photo mat.


Take the "Make Me Happy" stamp set and stamp out three of the large sunflowers, five of the medium sunflowers and five of the half sunflowers onto white cardstock using black archival ink.


I've used gold shimmer paint to colour them but you could also you watered down Bling Colour Paste or Olive Grove Mica Powder. I've also used Dusty Charcoal Colour Paste for the centres.


Fussy cut all flowers and set aside.


Mat your photo onto the scrap piece of black cardstock then arrange pieces around the photo as shown on my layout. Work out where your photo will be, mark the area in pencil then random stamp using both stamps from the "Memories" rubber stamp set using black archival ink.

Assemble and adhere all pieces as shown in my finished layout. I decided it needed something extra so I stamped three of the bees from the "Make Me Happy" stamp set, lightly coloured with the same gold shimmer, fussy cut then adhered around the page.

Here is my finished layout and some close up photos so you can see how I've created and embellished the page.


I hope you enjoyed this layout tutorial. Thanks for stopping by.
Until next time, happy crafting.
Julie xx

Saturday 1 February 2020

Scrap the Girls February Challenge

Saturday, February 01, 2020 0 Comments
Hi everyone! Today I'm sharing my first project as part of the Scrap the Girls Design Team. Scrap the Girls is a challenge whereby the only basic rule is - no boys! Every month there will be a mood board to follow for inspiration.

Here is my take on February's mood board plus close ups so you can see how I've created and embellished the page.


Products Used:
Cocoa Vanilla Studio Midnight Collection - Bloom and Grow Paper
Cocoa Vanilla Studio Happiness Collection - Die Cut Ephemera
Cocoa Vanilla Studio Happiness Collection - Die Cut Titles
Amsterdam Ink - Oxide Black
White Cardstock
Coloured Sequins

Thanks for stopping by, happy crafting.

White With 1 February Challenge

Saturday, February 01, 2020 0 Comments
Hi everyone! Today I'm sharing my Design Team inspiration project for White With 1 Challenge.

For the month of February the colour is "Azure Blue" and there is also a sketch to follow this month. You can reverse the sketch, flip the sketch or use it as it is, as long as it's identifiable to the sketch provided. To enter, simply post your entry to the White With 1 Facebook Group. For all of the details and DT inspiration go to: White With 1 February Challenge

Here is my inspiration layout plus close up photos so you can see how I've created and embellished the page.


Products Used:
Kaisercraft Indigo Skies - Misty
Kaisercraft Indigo Skies - Chambray
Kaisercraft Indigo Skies - Sticker Sheet
 Celebr8 Chipboard - MB4634
White Cardstock
Tim Holtz Distress Ink - Chipped Sapphire
Tim Holtz Distress Paint - Salty Ocean
Tim Holtz Distress Paint - Chipped Sapphire
Tim Holtz Distress Paint - Faded Jeans
Tim Holtz Distress Marker - Faded Jeans
Spellbinders Scalloped Circle Dies
Ranger Stickles - Twilight


Thanks for stopping by, happy crafting.

(C) 2023 Julie's Craft Haven. All Rights Reserved.