Wednesday 29 April 2020

Together Forever Card Toppers for Bee Arty

Wednesday, April 29, 2020 0 Comments
Hi everyone! I hope you are all staying safe and well. Today I'm sharing a couple of cards that I've made using the Forever stamp set from the Vampyre Rose Collection by Bee Arty.

I've done a few examples just to show how you can use the stamp differently and still get great results. You don't have to be a skilled colourist either, you can use different inks and mediums in different ways. Here are some close ups of my card toppers so you can see how I've created them.


Using Colour Blast Bling Embossing Powder


Coloured with Copic alcohol markers


Colouring just the outside using Copic alcohol markers and Colour Blast Shimmer Pen. You could also use Colour Blast Artist Inks, Mica Powders, Pencils etc.


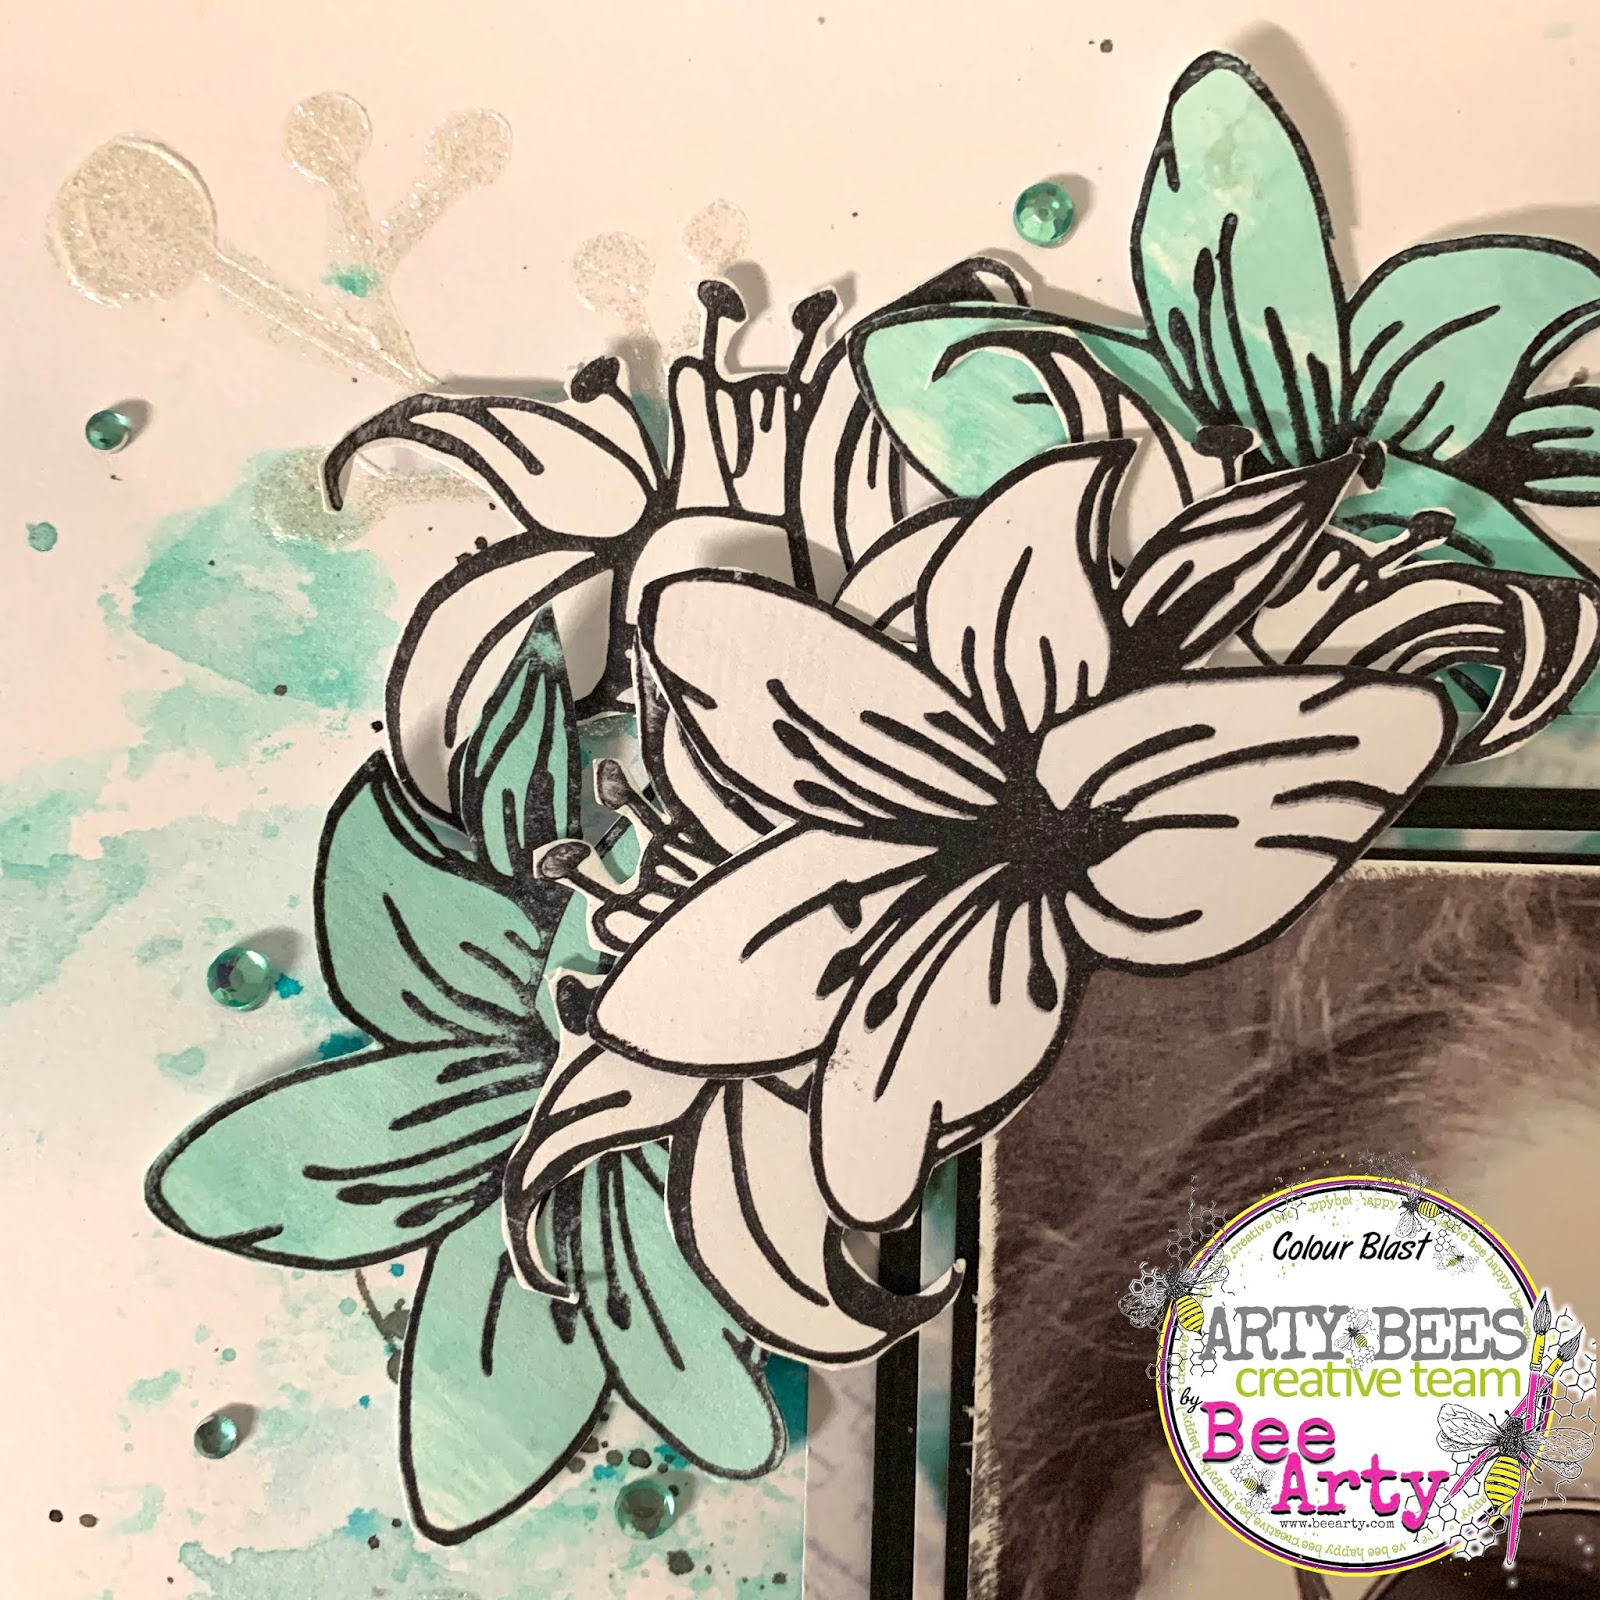
Using Colour Blast Shimmer Cubes. You could also use Colour Blast Mica Powder or Artist Inks.


Products Used:
Copic alcohol markers
White cardstock
Black cardstock
Glitter Cardstock

I hope you enjoyed this project. Thanks for stopping by.
Until next time, happy crafting.
Julie xx

Wednesday 15 April 2020

Find Yourself and Be That Layout for Bee Arty

Wednesday, April 15, 2020 0 Comments
 Hi everyone, today I'm sharing a quick and easy mixed media layout using the "Find Paradise" collection designed by Fiona Paltridge. This collection is so much fun, great for holiday snaps or quirky selfies like mine lol. It also fits the theme for this months challenge which is “Monochromatic Magic”.

My apologies for the lighting and page curling and buckling in photos. We had a lot of rain and high humidity when I was creating this layout. 


 To start, take a piece of white cardstock and trim down to 11 inch x 11 inch square.

Take a piece of black cardstock and trim down to 11 1/4 inch x 11 1/4 inch square. Cut out a one inch frame. This will be used to mat the white cardstock base. Use the cut out piece to double mat your photo.

Take the "Secret Garden" 12x12 paper and cut a one inch frame. Set the leftover piece aside for photo matting. Adhere the matted white cardstock base to the "Secret Garden" frame as shown.


Find a scrap piece of plastic (and old product packet) or even a large acrylic block and lightly spritz some water onto it. Add some paint (I've used the Colour Blast water colour paint) but you could also use Mica Powder in "Cool Mint", Shimmer Dust in Peacock, Colour Spray in "Lagoon", Artist Ink in "Mermaid" or even some Colour Paste in "Envy". Any of those products will work as long as you add water to it. Blend into the water then smoosh across the white cardstock base. Splutter excess across the page using a paintbrush. I wanted a little more depth and contrast for the splutters so I used Colour Spray in "Lagoon" and Artist Ink in "Soot".


Using the "Foilage Stencil" and Colour Paste in "Snow White", add paste over the "berries' only. Rotate the stencil (don't flip it) so you can do both sides. This adds a subtle accent and texture on the page.


Using the same green medium, randomly brush across some scrap white cardstock. Take the "Unwind Stamp Set" and stamp out the two lily stamps. You'll want to stamp some on plain white too to break up the cluster. I stamped five large lilies and three small lilies in green, one large lily and seven small lilies in white. You can add more or less if you like. Fussy cut and set aside. You will also need to fussy cut one large lily from the "Botanicals" 12x12 paper.


Double mat your photo using the centre pieces of paper and cardstock cut out earlier. Arrange and adhere your lilies as shown on the finished layout. Cut out the "Find Yourself and Be That" quote from the "Relax" 12x12 paper and adhere over the large white lily. I've added some matching gems for a bit of extra sparkle. 

Here is the finished layout plus close up photos so you can see how I've created and embellished the page.


Products Used:
Colour Blast by Bee Arty Paint Set Inspired (currently not available)
Other:
White Cardstock
Bling/gems

I hope you enjoyed this layout tutorial. Thanks for stopping by.
Until next time, happy crafting.
Julie xx

Wednesday 1 April 2020

White With 1 April Challenge

Wednesday, April 01, 2020 0 Comments
Hi everyone! Today I'm sharing my Design Team inspiration project for White With 1 Challenge.

For the month of April the colour is "Lime Chaser" and there is also a sketch to follow this month. You can reverse the sketch, flip the sketch or use it as it is, as long as it's identifiable to the sketch provided. To enter, simply post your entry to the White With 1 Facebook Group. For all of the details and DT inspiration go to: White With 1
Here is my inspiration layout plus close up photos so you can see how I've created and embellished the page.


Products Used:
Colour Blast by Bee Arty Artist Ink - Lime
Colour Blast by Bee Arty Artist Ink - Green
Bee Arty Clear Stamp Set - Life is Tough
Bee Arty Clear Stamp Set - Meridian
Bee Arty Clear Stamp Set - Textiles
Cocoa Vanilla Studio You Rock - Title Words
Cocoa Vanilla Studio Boys Rule - Flair Button
White Cardstock
Black Corrugated Cardstock
Black Archival Ink
Black Pen
Bike Charm
Black Trim

Thanks for stopping by, happy crafting.

Scrap the Girls April Challenge

Wednesday, April 01, 2020 0 Comments
Hi everyone! Today I'm sharing my Design Team project for the Scrap the Girls April Challenge. Scrap the Girls is a challenge whereby the only basic rule is - no boys! Every month there will be a mood board to follow for inspiration.

Here is my take on April's mood board.


Thanks for stopping by, happy crafting.

(C) 2023 Julie's Craft Haven. All Rights Reserved.