Showing posts with label Colour Blast Artist Ink. Show all posts

Wednesday, 26 August 2020

Artist Ink Rainbow Art Journal Page for Bee Arty

 Hi everyone, today I'm sharing a bright and cheery rainbow art journal page using Colour Blast Artist Inks and a stencil and stamp set from the Arty Farty Collection by Michelle Grant. With the world the way it is at the moment, we can all use a little extra colour to brighten our days.


Swipe some Artist Inks onto a scrap piece of plastic and add a few drops of water to dilute. Smoosh onto the page. Repeat each step with every colour overlapping as you go. The order of colours used is: Citrus, Cider, Sunburnt, Cranberry, Slipper, Berry, Marine, Mermaid, Glass, Lime. I repeated the process without diluting the Artist Inks to give a little more depth and dimension to the colours.

When the page is dry, stencil the paint brushes and "Live Life in Full Colour" quote using the Beautiful Mess stencil and black archival ink as shown. 
 
Random stamp the paint brushes and "doodle" stamp from the Live Your Art stamp set and black archival ink. Stencil random paint blotches as shown. I've traced over the quote, paint brushes and stencils with a white paint pen, then scribbled over the doodles with a black pen.

To finish, outline the whole page using a black pen or ink to frame the page.

Note: I haven't used any gesso on my page as I wanted the ink to "grip" onto the paper. You can of course gesso your page first but if you're using white gesso it will dilute the intensity of the artist inks.
 
Bee Arty Products Used:

Other Products Used:
 A4 Journal
Black Archival Ink
white paint pen
black pen
 
I hope you enjoyed this project. Thanks for stopping by.
Until next time, happy crafting.
Julie xx

Wednesday, 29 July 2020

Rainbow Artist Ink Card Set for Bee Arty

Hi everyone, today I'm back on the blog sharing a set of cards I have made using various Bee Arty dies. I can't ever just make one card as I have so many ideas and want to do them all at the same time, so I usually end up making a set. I should warn you though, there is A LOT of die cutting in this project. Great to do if you're watching TV or don't have a lot of creative mojo.


The card bases are all A2 size - 4.25" x 5.5" cut from black cardstock. The white layers are all cut to 1/8 of an inch smaller. The backgrounds are made using Colour Blast Artist Inks and water layered at different stages to get different effects.


These are all of the die cuts used to make each background.


These are the die cuts you'll need to embellish each card. Each embellishment has been die cut three times from white cardstock and adhered together. I have used the same colours to paint the die cuts according to each card. Then to add some shimmer and shine I've used the Colour Blast clear shimmer pen and some Glossy Accents. For the sentiments, I've just used some from various stamp sets that I had on my table at the time.

*At the time of photographing I was planning to use all three flowers from the "Flowers of Paradise" die set but only used the medium flower. The Flower Power die cuts are also missing from the photo as at that stage I hadn't planned on using them.


Here are my cards plus a list of products used on each card so you can recreate them.

Products Used:
Background - Honeycomb Metal Die
Embellishments - My Flower Metal Die

Products Used:
Background - Brick & Wall Metal Die*
Embellishments - Desire Metal Die

Products Used:
Embellishments - Flowers Metal Die

Products Used:
Embellishments - Sweet Floral Metal Die

Products Used:
Background - Linked In Metal Die
Embellishments - Flowers of Paradise and Leaves of Paradise Metal Dies

Products Used:
Background - Web Metal Die
Embellishments - Flower Power Metal Die

Other Products Used:
Black cardstock
White cardstock
Glossy Acents
Sentiments used from various stamp sets from personal stash

I hope you enjoyed this project. Thanks for stopping by.
Until next time, happy crafting.
Julie xx


Sunday, 24 May 2020

Bee Arty Grafitti Grunge Kit for Bee Arty

Hi everyone, today I'm sharing a kit that I created for Bee Arty using the Graffiti Grunge Collection. These kits are available for a limited time and available to purchase from the Bee Arty website.


In this kit you will receive:

Paper

A range of 12"x12" Paper Sheets :

4 x Double sided sheets
Epic
Perfect
Be Yourself
Tough
Keep Going
Bravely

Stencil

Chain Links 

Embellishments

Black cardstock
White cardstock
7 Dots Studio Elements
Die cuts From Cog Globe Die set
Die cut from Postage Stamp
Die cuts from Flowers die set  
Die cuts from Going My Way
Numbers Washi Tape
Silver wire
Brads

Instructions

 Full colour photos only.

Please note - No Mixed Media supplied with the Kit.
Julie has used Colour Blast Paste in Just Blue, Mica Powder in Sienna and Calypso Artist Ink

  Thanks for stopping by.
Until next time, happy crafting.
Julie xx

Wednesday, 15 April 2020

Find Yourself and Be That Layout for Bee Arty

 Hi everyone, today I'm sharing a quick and easy mixed media layout using the "Find Paradise" collection designed by Fiona Paltridge. This collection is so much fun, great for holiday snaps or quirky selfies like mine lol. It also fits the theme for this months challenge which is “Monochromatic Magic”.

My apologies for the lighting and page curling and buckling in photos. We had a lot of rain and high humidity when I was creating this layout. 


 To start, take a piece of white cardstock and trim down to 11 inch x 11 inch square.

Take a piece of black cardstock and trim down to 11 1/4 inch x 11 1/4 inch square. Cut out a one inch frame. This will be used to mat the white cardstock base. Use the cut out piece to double mat your photo.

Take the "Secret Garden" 12x12 paper and cut a one inch frame. Set the leftover piece aside for photo matting. Adhere the matted white cardstock base to the "Secret Garden" frame as shown.


Find a scrap piece of plastic (and old product packet) or even a large acrylic block and lightly spritz some water onto it. Add some paint (I've used the Colour Blast water colour paint) but you could also use Mica Powder in "Cool Mint", Shimmer Dust in Peacock, Colour Spray in "Lagoon", Artist Ink in "Mermaid" or even some Colour Paste in "Envy". Any of those products will work as long as you add water to it. Blend into the water then smoosh across the white cardstock base. Splutter excess across the page using a paintbrush. I wanted a little more depth and contrast for the splutters so I used Colour Spray in "Lagoon" and Artist Ink in "Soot".


Using the "Foilage Stencil" and Colour Paste in "Snow White", add paste over the "berries' only. Rotate the stencil (don't flip it) so you can do both sides. This adds a subtle accent and texture on the page.


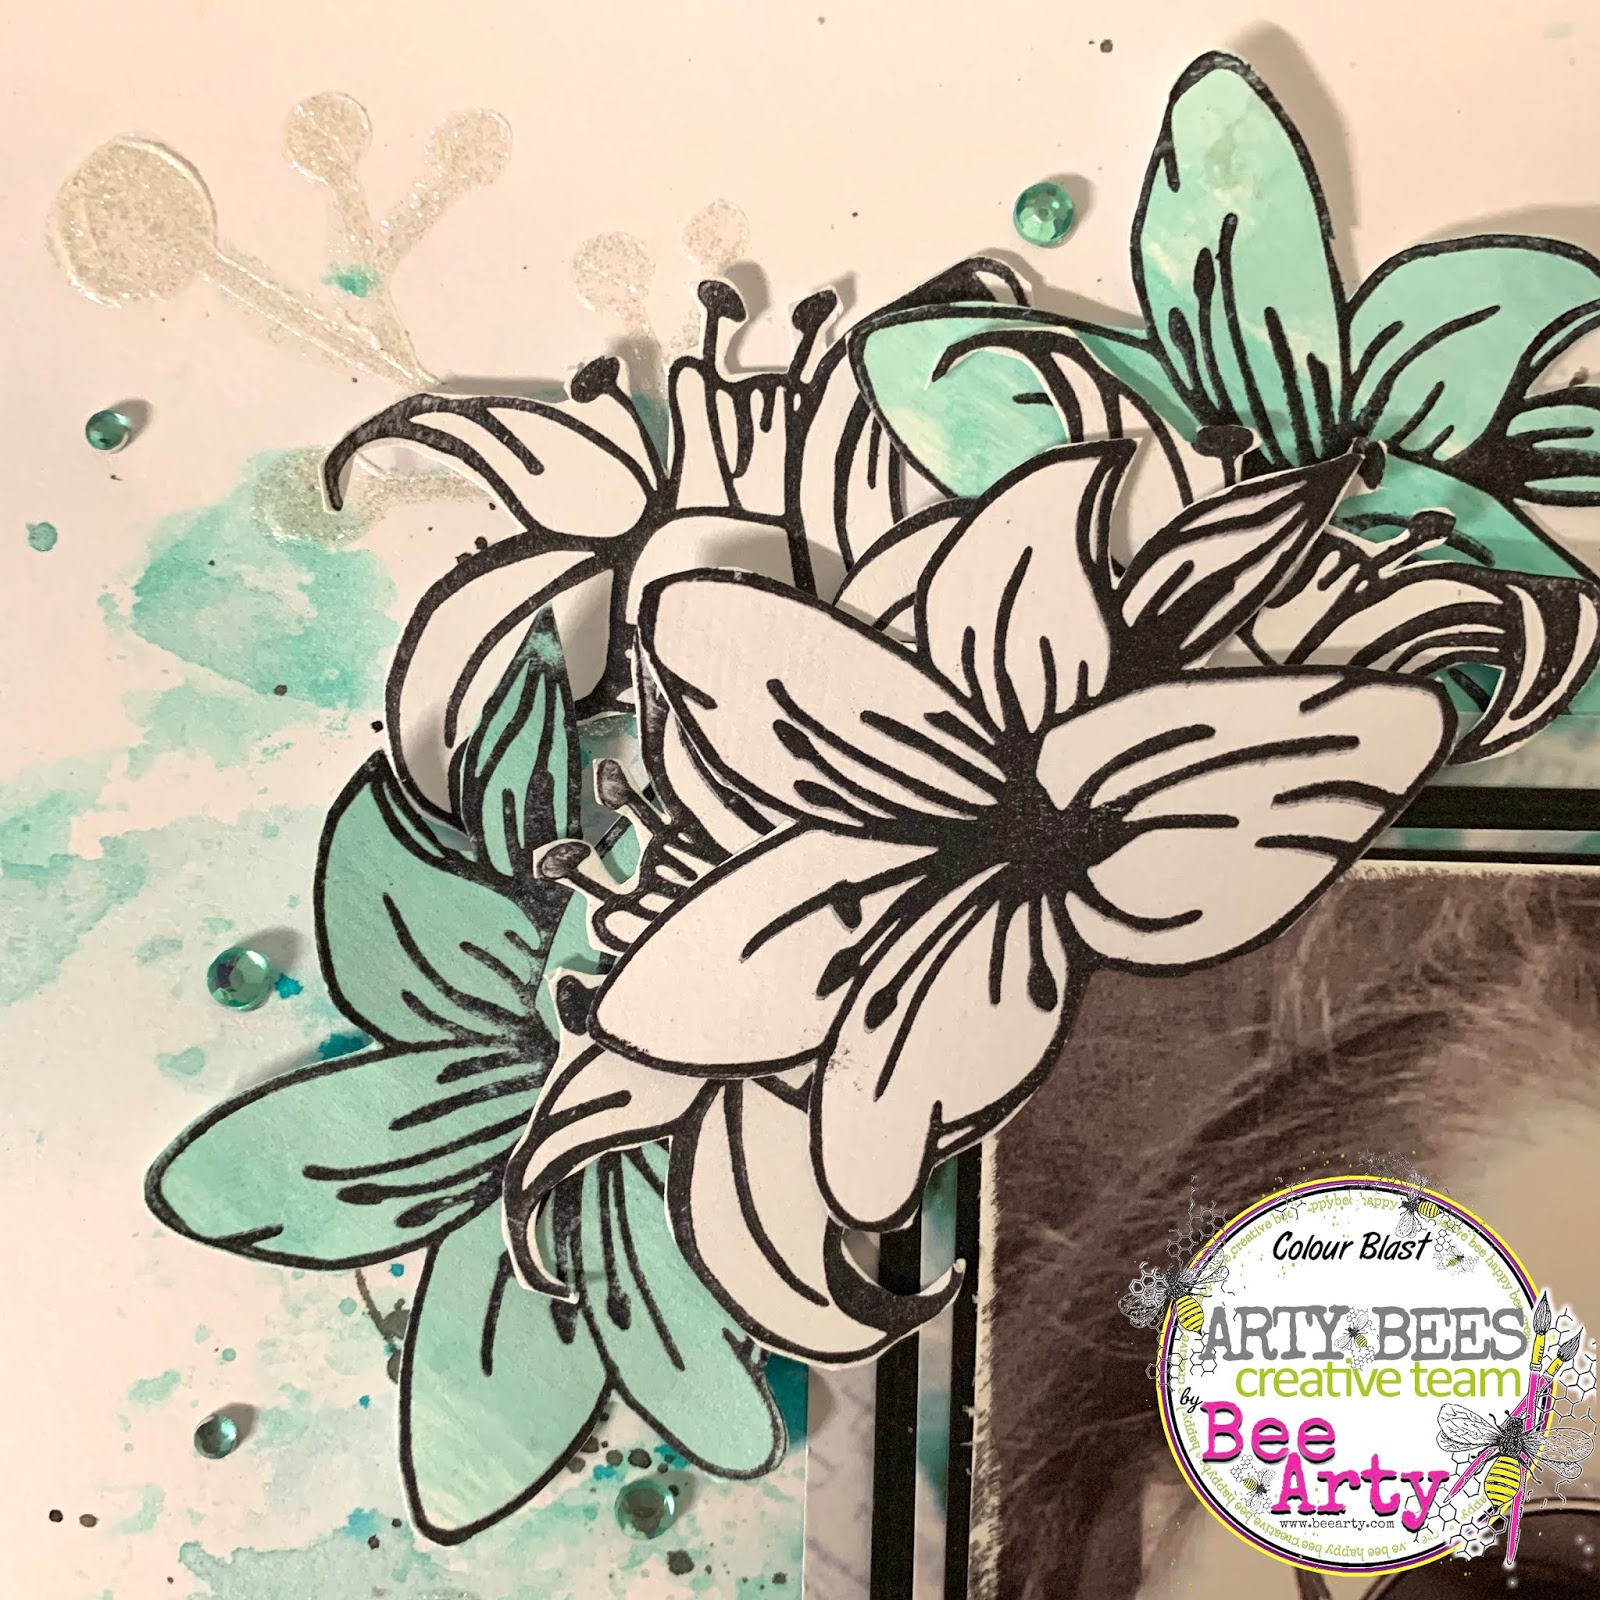
Using the same green medium, randomly brush across some scrap white cardstock. Take the "Unwind Stamp Set" and stamp out the two lily stamps. You'll want to stamp some on plain white too to break up the cluster. I stamped five large lilies and three small lilies in green, one large lily and seven small lilies in white. You can add more or less if you like. Fussy cut and set aside. You will also need to fussy cut one large lily from the "Botanicals" 12x12 paper.


Double mat your photo using the centre pieces of paper and cardstock cut out earlier. Arrange and adhere your lilies as shown on the finished layout. Cut out the "Find Yourself and Be That" quote from the "Relax" 12x12 paper and adhere over the large white lily. I've added some matching gems for a bit of extra sparkle. 

Here is the finished layout plus close up photos so you can see how I've created and embellished the page.


Products Used:
Colour Blast by Bee Arty Paint Set Inspired (currently not available)
Other:
White Cardstock
Bling/gems

I hope you enjoyed this layout tutorial. Thanks for stopping by.
Until next time, happy crafting.
Julie xx

Wednesday, 19 February 2020

Love Exists in Our Hearts & Souls Layout for Bee Arty

Hi Crafty Bees! Today I'm sharing a layout that I created using the stunning collection designed by Sue Smyth called "Vampyre Rose". This collection captures both "dark and light" and can be used for wedding/formal projects, masculine projects or even what I have done here.. gone to the dark side!

Here is my finished layout with a brief tutorial so you can see how I created it.


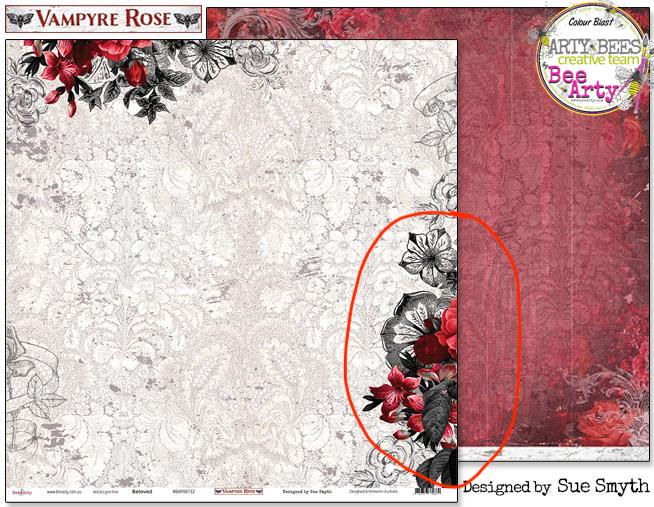
Since I have used a lot of different elements from different papers, I've circled each one so you will know exactly which pieces to use.

Take the "Smitten" 12x12 paper to use as the base (reverse side). Cut out the "Love Exists in Our Hearts and Souls" quote from the "Smitten" 12x12 paper. If you don't have a spare sheet of the "Smitten" paper, you can carefully cut it out from your base, cover with scrap paper at the back and then place your embellishments over the area so you won't see it. Ink around the edge with Cranberry Artist Ink and a clean paint brush.


Lightly stencil around the centre photo area and random areas on each side using the "Devotion" stencil and Steel Colour Paste. It plays off the print in the paper perfectly.


Fussy cut the flower clusters from the "Immortal" 12x12 paper - front and back.


Cut out elements from the "Poison" 12x12 paper. You'll need the floral tag in tact. I've fussy cut the crow from the tag and kept the top and bottom to use as embellishments. The "Together Forever" was cut in half and used as part of the photo mat.


Cut the elements from the "Gargoyle" 12x12 paper. You'll need the medium wings, two black and white roses and the arch window which has been cut in half.


Cut floral elements from the "Beloved" 12x12 paper. I've used the reverse side for photo mat.


Using the dropper, take the Cranberry Artist Ink and dribble ink in five random places as shown. One from each side where you've stenciled coming in from the edge and three coming down from your photo area. It's meant to be blood but you can skip this part if you're not comfortable with it.

Use Cranberry Artist Ink and paint brush to edge the layout base. It doesn't have to be perfect, in fact, the messier the better. Splatter Cranberry Artist Ink with a clean paint brush randomly around the layout (make sure you cover your photo first).

Accent with red heart gems including the Crow's eye and red web trim.

Add some red ribbon to tags.

Here are some close up photos so you can see how I've created and embellished the page.