Showing posts with label Ultimate Crafts. Show all posts

Monday, 4 December 2017

You Are Beautiful - Foiled Bohemian Card

You Are Beautiful - Foiled Bohemian Cards

#artdecocreations   #couturecreationsaus    #ultimatecrafts  

Hi everyone! It's Julie here back on the blog today sharing a clean and simple card using the GoPress & Foil Machine from Couture Creations.


To start I've taken the Orchid Box hotfoil stamp and placed it onto my GoPress & Foil Machine to heat up. Using some Phantom Purple hotfoil, I've foiled onto a smooth piece of white cardstock.


I've used the largest die from the Victorian Squares nesting die set to cut out the hotfoiled image. This shape works perfectly with both the Orchid Box die and hotfoil stamp. I've tacked it down with washi tape to hold in place. Note: The Victorian Squares set has been discontinued but is still available in some stores.


This particular die is the largest in this set. To create a backing layer, place the same die onto the back of some purple glitter cardstock. Tack down with wash tape.


Trace around the outside of the die and cut out the shape.


 Adhere to the glitter cardstock using strong adhesive tape or glue. Then adhere to the front of the card with foam tape or dots.


Cut the Orchid Box die using purple glitter cardstock. Trim off the four "orchids" and adhere each one underneath the main panel as shown.


 For the sentiment, foil the Beautiful Inside and Out hotfoil stamp onto some smooth white cardstock using more of the Phantom Purple hotfoil. Trim down and adhere to some purple glitter cardstock. Adhere to the centre of the focal piece using foam tape or dots.


  Add some 2mm Crystal gems as shown to complete the card.


PRODUCTS USED TO CREATE THS PROJECT:

ULT158080 Orchid Box Hotfoil Stamp
ULT158070 Orchid Box Die

Artdeco Creations Products:
AD90018 Square Card
ULT158088 Beautiful Inside and Out Hotfoil Stamp
CO724845 Square White Card
CO724156 2mm Gemstones Crystal
CO723048 Victorian Square Nesting Dies (discontinued)
 
Other:
Purple glitter cardstock

Thanks for stopping by, I hope that you enjoyed this tutorial.
Until next time.
Happy Crafting!

Wednesday, 4 October 2017

White With 1 October Challenge

October is Breast Cancer Awareness Month here in Australia which is an annual campaign to increase awareness of the disease.  I am sure there are few of us who have not been touched by breast cancer in some way from amongst our families, friends, neighbours or work colleagues.  So this month we are using PINK WHISPER in honour of this cause. I urge each and every one of you to be vigilant in your self awareness and care - early detection saves lives so ladies please, please check your breasts.  For those in Australia here is a link to the National Breast Cancer Foundation where there is vital information and an opportunity to make a donation if you wish.
 
Hi everyone! Today I'm sharing my October inspirational piece for White.. With 1. The colour for October is Pink Whisper and there is also a mood board for inspiration too.


White.. With 1 challenges require your layout to be at least 85% white PLUS the specified challenge colour for that particular month. You can use black (or dark brown) as an accent colour on your layout but it must not be the dominant colour, unless it is the specified colour for that month. The full WW1 challenge rules can be found here. This year there will also be either a mood board for inspiration or a sketch to follow.

White.. With 1 Challenges are sponsored by:


You have a chance to win an EXCLUSIVE Mystery kit from THE RESIN RAINBOW based each month on our own monthly colour here at White..with 1.  One of these amazing kits will be put aside for one lucky Australian / New Zealand entrant who will be chosen by creative team vote.

 
Our random draw winner up each month will receive a delightful selection of handmade embellishments, flairs and flowers (chosen from amongst these) from SCRAPPERS GARDEN.  Some beautiful creations here and available from her STORE.


Thanks for stopping by!

Monday, 3 July 2017

Artdeco Creations - Be Yourself Layout

Hi everyone! I'm super excited to be sharing my very first project as part of Artdeco Creations Creative Team for 2017/18. I'm honoured to be a part of this team and be creating for Artdeco Creations, a local company based here in Brisbane, Australia.

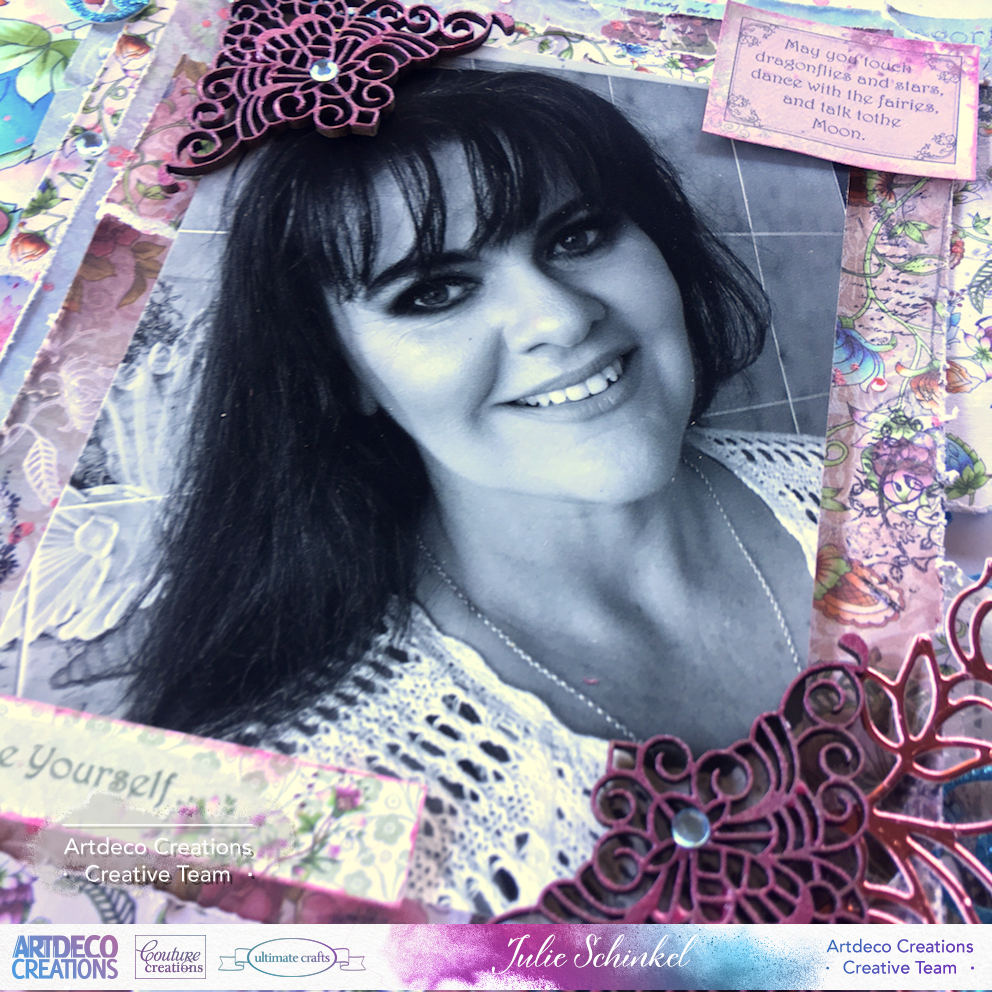
Today I'm sharing a mixed media layout featuring an upcoming collection designed by the talented Denise Boddey. This collection is called "Bohemian Bouquet" from Ultimate Crafts and it's gorgeous! The blues, reds and yellow toned pages give you so many options - either use them separately or combine them to create a bright, colourful project. Here is my layout and steps to showing you which tools and products to use and how I created it.


I took some Couture Creations Anna Griffin Matte Texture Paste and mixed it with some Couture Creations Anna Griffin Mix and Match Pigment Powder in Blue


I then took the Field of Daisies 6x6 stencil and applied the paste in randomly on white cardstock, from the top left down to the bottom right of the page. Rotating the stencil when applying pastes/sprays gives more variation to the pattern. There is no rule saying that you have to use the stencil in the same direction each time, so go for it and experiment. That's what creativity is all about.


Next I took some more of the Couture Creations Anna Griffin Mix and Match Pigment Powders in Pink and Red and mixed them together to get the tone matching the colours used in the papers. I then added water to the pigment powders and created splatters across the page with a paintbrush. I didn't add water to the page itself, I let it dry as it so the colours wouldn't muddy.


Next up I chose three papers from the 6 x 6 paper pad and randomly tore them to create a mat for my photo. The "clean" edges were distressed to match the torn edges. The more distressed the better.


The dies in this collection are simply gorgeous and it was hard to choose which ones to use. I ended up choosing the Curling Floral Decorative Die and Orchid Decorative Die dies as they best complimented the pieces from the Diecut Decoupage Set that I used on this layout. I die cut these using blue glitter cardstock and pink foil cardstock. You could also use Couture Creations foils for these as well. I cut the blue die cuts in half so I could arrange them better on the layout.


I took some Ornate Corners chipboard pieces from the collection and covered them with Ultimate Crafts Liquid Drops 3D Pearl in Flamenco. I squeezed some out onto a Couture Creations non stick craft mat and by using my finger, lightly covered the chipboard to give it a hint of colour and compliment the rest of the embellishments on the layout.


And here is my finished layout along with some close ups showing how I arranged the embellishments. I can't do a layout without some bling, so I randomly added some Couture Creations 2mm Gemstones in Pink Lace and mixed gemstones in Blue Iceberg. I also added some Blue Iceberg gemstones to the chipboard pieces as well. The quotes are from the 6x6 paper pad which I cut out and "inked" with the Flamenco  Liquid Drops. I randomly stamped across the page using stamps from the "Be Yourself" stamp set using black archival ink.


Artdeco Creations Products Used:

Other Products:
Pink Foil Cardstock
Black Archival Ink

Thanks for stopping by. Happy Creating!


Saturday, 24 June 2017

Artdeco Creations Design Team 2017/2018

Hi everyone! I have some exciting news to share with you. I'm joining the Artdeco Creations Design Team for 2017/2018. I'm super excited to be joining the team and to have the opportunity to create with a group of talented and lovely ladies.


Introducing the Design Team for 2017-2018

#artdecocreations   #couturecreationsaus    #ultimatecrafts  


Would you please join us in congratulating our Design Team for 2017-2018.  These ladies are well known to many of you and we look forward to them creating some amazing projects with the large array of new collections that will be released. 

This year we have  a smaller core team but we have some great Guest Designers who will all give you fabulous projects each and every month.


 We welcome our 2017/18 fabulous Design Team

(Creative Team)
(Creative Team)
(Creative Team)
(Creative Team)
(Design Team Coordinator)

We will also have a great lineup of Guest Designers including:


We can't wait to see what these amazing ladies will create for us this year. Please visit their blogs to see what beautiful projects they have been creating and don't forget to leave them all some love. 

We look forward to inviting other Guest Designers throughout the year, so please if you create something with our products please make sure you share with us on Facebook or tag us on Instagram.
 
You too could be a Couture Creations | Ultimate Crafts Guest Designer.


Thanks for stopping by!

Monday, 20 February 2017

L'Aquarelle Designs Collection - Ultimate Crafts

Hi everyone! Today I am sharing a sample card that I made using the new release L'Aquarelle Designs Collection from Ultimate Crafts. L'Aquarelle Designs Collection is a range of beautiful watercolour papers with very fresh and on trend designs.


You will find this and plenty of inspiration in the current issue of Creative Inspiration Magazine #20. Have a look and see what the Design Team and Round Table Creative Team have created for you. You can also check out the Artdeco Creations Blog for more inspirational pieces from the Design Team. Happy crafting!

https://issuu.com/artdecocreations/docs/coinsp20

Thanks for stopping by!

Monday, 13 February 2017

Magnolia Lane Layout

Hi everyone! Today I am sharing a layout I created last year using the Magnolia Lane collection from Ultimate Crafts.


 Products Used from the Magnolia Lane Collection:
Gentle Magnolias and Lace Paper
Floral Fancy Paper
Elegant Lady Paper
Rose Cutting Die
Metal Trinkets
Oval Cabochons
Diecut Ephemera

Thanks for stopping by!

Friday, 7 October 2016

Wild & Free Cards - Couture Creations

#couturecreationsaus #ultimatecrafts

Hi everyone! I'm really excited to be a Guest Designer for Couture Creations for the month of October.

My name is Julie Schinkel and I'm from Brisbane, Australia. I first got into scrapbooking as a hobby with my mum in 2011. Since then I've discovered and developed a passion for card making, Copic colouring, mixed media, off the page and art journaling. Prior to that I was into ceramics (pottery I believe it's called in the US) and also art in high school. I love being creative, it's great therapy and also a great way to network and meet like minded crafty people.

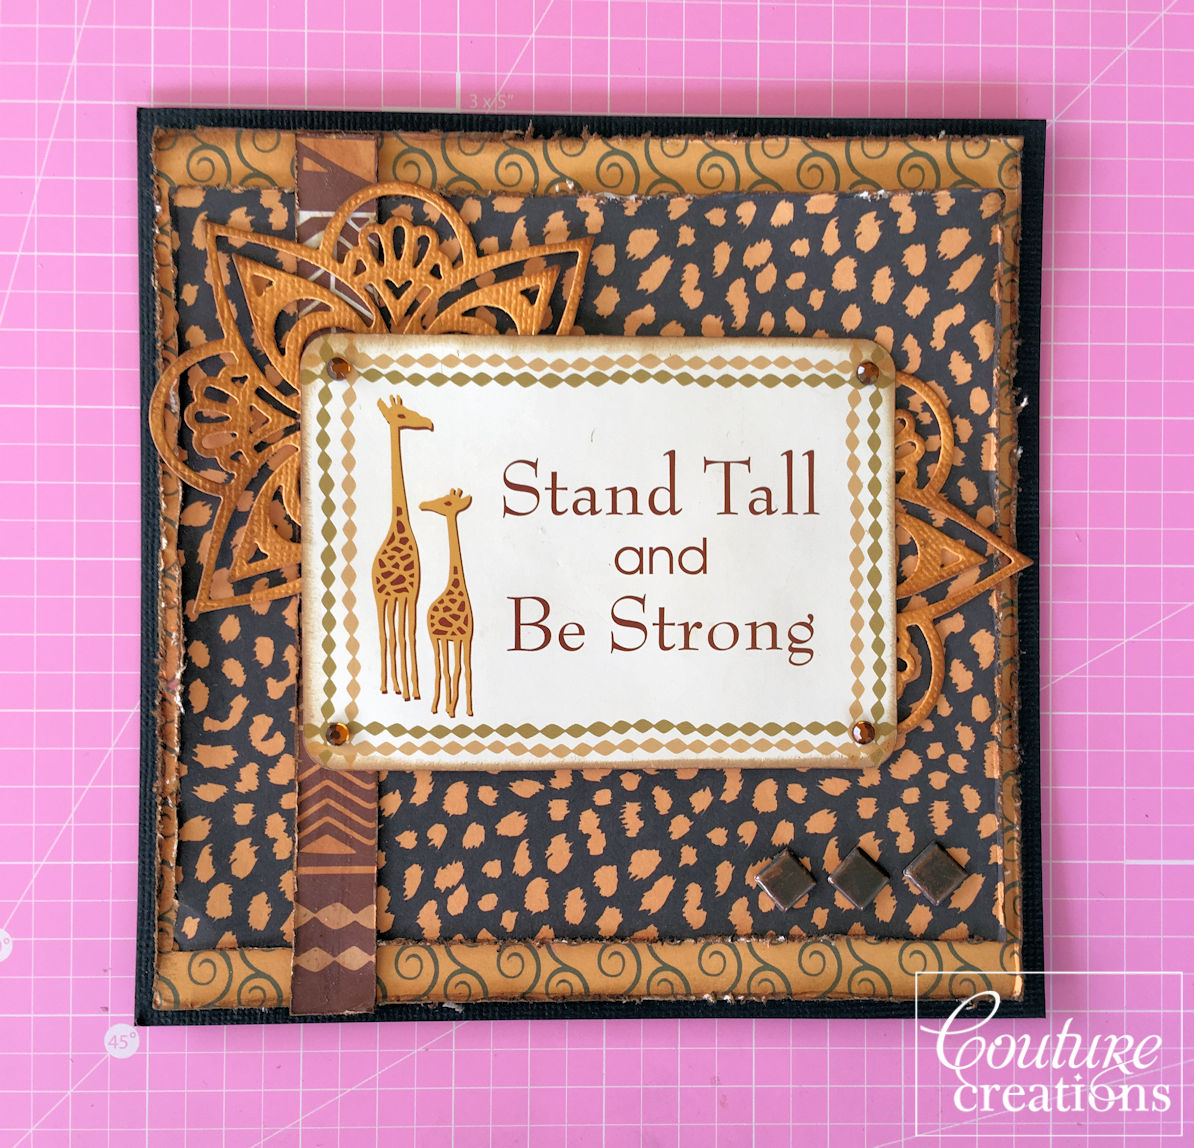
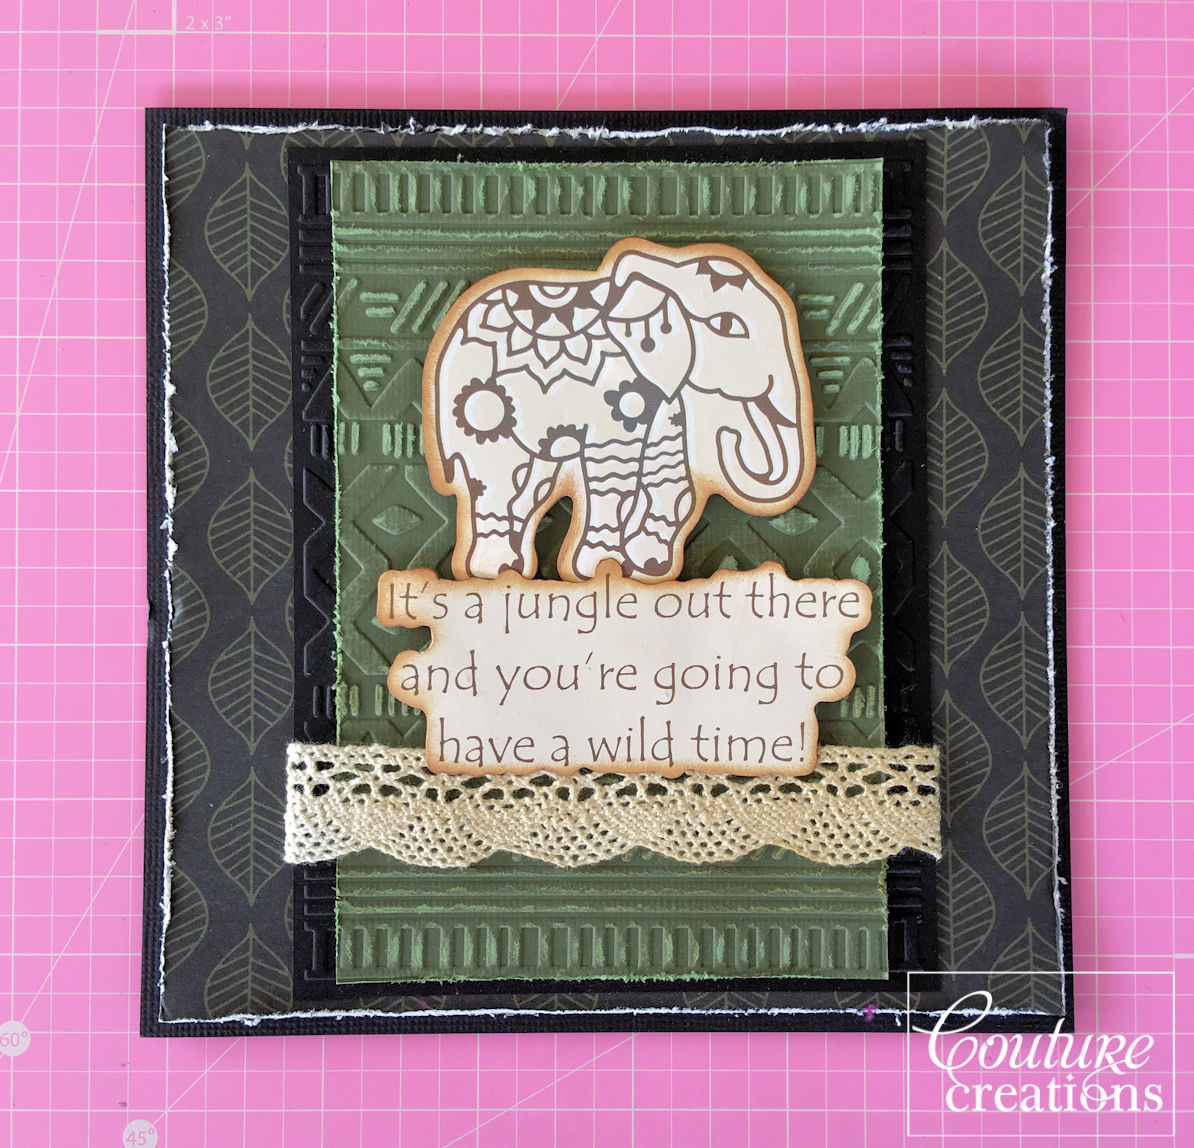
My cards today are made using papers and ephemera from the new "Wild & Free Collection" from Couture Creations. This collection is perfect for any zoo or African themed projects as it has both animal prints and the tribal designs. If you have been lucky enough to see these beautiful animals in the wild, it's a great collection to present and preserve those wonderful memories. They can also be used for cards like I am showing you today. The only limit is your imagination! 

So let's get started with how I created these cards. I made eight cards in total, these can be given out individually or as a gift themselves as box set. The choice is yours! I started with a 6" x 6" square base using black cardstock. I then chose various pattened papers and cut them down to 5 3/4" x 5 34" square.


Next I chose various items from both the ephemera pack and sticker sheet that came in the paper pack and coordinated them with the papers. I added another layer of paper to some of the cards. These were cut at 5 1/2" x 5 1/2" with some cut a further half inch off either side so the layer underneath could show through more. All papers, ephemera and stickers have been distressed with either brown ink or a distressing tool.


The Chiamaka Doily die is beautiful, not only on it's own but it can be cut down and arranged as a peek-a-boo piece or even as a bigger doily.


The three cards below shows the same die used in different ways.


This is the beautiful Lovebird's Feather die using the handmade paper from Ultimate Crafts. Try it using the sandable cardstock to give a distressed look. It looks great!


I've added two layers of cardstock on this card both embossed with the Tribal Crosshatch embossing folder. The top layer has been lightly sanded to show the patten and give a distressed look.


Next is just assembling the cards. I've randomly added some ribbon, lace, pearls and rhinestones to each card to give the finishing touches. Here are the finished cards! 


 I hope that you like these cards that I have created for you today. Feel free to replicate these or perhaps take some inpiration from them and create your own set of Wild & Free themed cards.

Products used:

Thanks for stopping by
Happy crafting!